Showing posts with label 7D. Show all posts

Wednesday, November 20, 2013

Lens Turbo impressions with Canon FD 50mm f1.4 and FD 35mm f2 on Sony NEX

by Hasan Karagülmez


Mitakon Lens Turbo - Canon FD 50mm 1.4 - Sony NEX-6


This turned out to be pretty lengthy blogpost, so here's an overview of what's included for your convenience:

  1. Introduction
  2. So... what does it look like?
  3. Why the Canon FD-mount version?
  4. Lens Turbo + Canon FD 50mm f1.4 sample pictures
  5. So, what about the Canon FD 35mm f2
  6. Compared: Lens Turbo + FD 50mm 1.4 vs EF 50mm 1.8
  7. Compared: Lens Turbo + FD 35mm f2 vs Sony 35mm 1.8 OSS (SEL35F18)
  8. Conclusion


Introduction

Hey all, in this blog post I'm going to share my experiences with the Mitakon Lens Turbo. I assume most of you have heard of it by now, it's a device similar to the (much more expensive) Metabones Speed Booster. They work in the same manner though, and these so-called Speed Boosters are most easily understood as working as the reverse of a teleconverter.

Instead of concentrating your sensor on a smaller portion of the lens, it instead makes use of *more* of the lens. This is possible if you're using a smaller-than-fullframe image sensor (i.e. camera's with crop-sensor, such as Sony NEX-6, Canon 7D), together with a full-frame lens.
The adapter essentially concentrates the light that normally falls outside of the crop image-sensor onto the the image sensor itself.

If we would visualize sensor-sizes, we could get a graphic like this:


A full-frame sensor, like that in the Canon 5D mark III, is 36mm x 24mm (864mm2).
An APS-C sensor, like that in the Sony NEX-6, is 23.5mm x 156mm (336mm2).


Now you can see part of the reason why a full-frame camera is so expensive: its sensor is 864/336 = 2,5 times bigger than an APS-C sensor!

We can also prove that an APS-C sensor like that in the NEX-6 is a 1.5x crop sensor, by dividing: 36/23.5 = 1,53 or about 1.5 crop.

The reason why the Lens Turbo covers a slightly smaller area than that of the full-frame sensor (orange area) is that it's a 0.726x adapter.
That means that if we do 1.5 cropfactor * 0.726 = 1,089 (actually about 1,112) - basically we have an effective 1.1 crop sensor if we use the Lens Turbo (where 1.0 would be full-frame).


What you can also see is the white-circle, which designates the imaging circle of a full-frame lens. As you can see, a lot of light falls outside of the APS-C area when using a full-frame lens.

The Lens Turbo catches the light of the green area (APS-C + Lens Turbo) and projects that light onto the blue area, which is the area of the APS-C sensor as used in the NEX-6.


So, what this means in practice is that with the Lens Turbo you'll get a close to full-frame (but not quite) effect on a crop-image sensor body.

Now, of course, if you concentrate all the light onto a smaller area, you get the added bonus that you effectively double the amount of light, as that's the amount of light that would otherwise fall outside of the crop-sensor area. 

...

Hold on, that's a huge advantage! 

Double the amount of light can translate into a shutter speed that can be twice as high, or indeed, an ISO-setting (a.k.a. ISO-speed) which is a full-stop lower - MOAR light, hooray!!11!

You can see why these kinds of adapters are also called Speed Boosters.


This all sounds rather good, right? So let's have a further look - there are also more photo's to look at, rather than text, I promise!


So... what does it look like?

Well, the adapter itself looks pretty plain, with some inscribed markings. Inside the package there's a small leaflet, which should be helpful but is actually all in Chinese :)

The adapter itself actually has quite a bit of heft to it - it's quite a bit heavier than you would expect it to be. It's reassuringly solid though, and makes for quite a nice-looking black package on the Sony NEX-6:


Notice the FD-mount aperture locking pin just below the Lens Turbo lens

Another nice thing: the Lens Turbo is actually smaller than a normal adapter. Small camera = good :)

Lens Turbo with Canon FD 50mm 1.4 mounted

Besides weight, a big advantage of small camera's is that it's less in-your-face than a full-blown DSLR. Being less intimidating helps when photographing in public, you stand out way less and keeps people looking natural. It's just a small compact-cam afterall ;)


Why the Canon FD-mount version?

As you can see, I chose the Canon FD version of the Mitakon Lens Turbo. Canon changed lens-mounts in the late 80's from FD-mount to EF-mount. With it, a big difference was introduced, namely that the new EF-mount features all electronic connections between the lenses and their camera bodies. Having an all electronically controlled aperture of course results in that EF mount lenses don't feature an aperture ring. Or at least I don't know of any :)

Now, this is especially important because as you've noticed, the Mitakon Lens Turbo doesn't actually feature any electronic contacts. If I'd mount an EF-mount lens (and I do have some quality EF-mount glass), I'd have no way to actually change the aperture. 

Not exactly what I'd call handy!


The Metabones Speed Booster *DOES* have the ability to communicate and change the aperture lenses electronically on Canon EF lenses, but it's a heck of a lot more expensive - about 3 times as expensive as the  Mitakon Lens Turbo here in the Netherlands. It also does autofocus on Canon EF lenses, albeit very slowly. In fact Metabones themselves mention that it'll likely disappoint and you're better off manually focusing.

Since this is all just a hobby, and I'm actually on a budget of what I'm willing to spend, I chose the Canon FD-mount version.

Some further research actually taught me that the Canon FD-mount version is the most popular, as the FD-mount has one of the smallest register distances (i.e. the distance of the sensor to the lens-mount) of legacy camera systems, allowing other legacy glass to mount on this FD-adapter as well.

This is because mount-adapters are able to fill up the space between the lens and the sensor, as long as the adapting mount (e.g. FD-mount) is larger than the register distance of the host system (e.g. NEX). After all, a lens always projects its image onto the image sensor from a set distance, as designed by its manufacturer. 

Because the NEX-system (neé, Alpha) again has a much smaller register distance than the FD-mount system, adapters like the Lens Turbo are possible which fill in the register distance gap between FD and E-mount, as used by the NEX-system.


E-mount (NEX) and EOS-mount (Canon) compared


The above image (somewhat crudely) shows register distances as illustrated by a Canon 7D and a Sony NEX-6, aligned on sensor-location on the green line. 

The yellow line indicates the lens mount for the NEX E-mount system, whilst the red line does the same for the Canon EOS-mount. 


Anyway, what this illustrates is that there's plenty of space between the yellow (E-mount) and red line (EF-mount) for an adapter to be placed. This space saving is made possible because mirrorless systems, well... don't have a mirror :)

I've only got two lenses for now, since I've only got a it a couple of weeks, which is the Canon FD 50mm f1.4 and FD 35mm f2. As you can see I went for the so called FDn, or New FD, lenses, primarily because they are supposed to be lighter than the older Canon breech-mount lenses. Those breech-mount lenses are easily identifiable from a distance by having a chrome ring at the lens-mount.

Canon FD brothers :)


I bought the Canon FD 50mm 1.4 first, as I was just very curious about how all this manually focusing would work out. It could be that I wouldn't like it at all. So, I chose this lens because it's quite cheap, and the nice thing about buying cheap is of course that it lowers the entry barrier.

Another consideration is that I'm really an autofocus guy, and this is actually the first manual focus lens I've ever held in my hand, let alone use. I wasn't exactly sure that I'd even like manual focusing :)

Luckily, these FD lenses can be picked up for pretty cheap, I paid 50 euro (about 67 US Dollar) for the FD 50mm 1.4, and it's in mint condition. 


On the first day I bought it, I first had to figure out how to correctly mount the Lens Turbo onto the lens. It's actually a bit more finicky then you'd expect. You first have to align the lens on the adapter on the red dot, then twist a bit backwards aligning to the yellow dot, and then rotate again the other way to securely mount it.

Here's a video to show the locking process of an FD lens onto the Lens Turbo:


This extra step is necessary because the Canon FD-mount lenses have a bit of metal sticking out which actually enables the aperture ring on the lens, and it needs to be in the correct place before you can operate the aperture via the aperture-ring on the lens.

That's right: if you haven't mounted the lens, you cannot operate the aperture of the FD-lens by turning the aperture-ring.

If you're wondering if the manual of the Lens Turbo doesn't help, then you're right: it doesn't help. Or, at least, my Chinese isn't very good so it's of no help to me :)


The leaflet included with the Lens Turbo says something about tolerances. Well, I *think* it does so anyway :)


Lens Turbo + Canon FD 50mm f1.4 sample pictures

OK, that's enough talk, what do the pictures look like?

Well, here are some images I shot the first day I had my first lens for the Lens Turbo, the Canon FD 50mm f1.4:


More are available on the webalbum over at:
https://plus.google.com/photos/+HasanKaragülmez/albums/5939560062371528433


I'd describe these as "bokehlicious"  :) 

In fact, I don't have another lens which can so easily throw the entire background into a complete and buttery goo! 
Perhaps I went a bit overboard with some, but hey: it's always nice to play with something new right? :)

I also have a series shot with the Canon 50mm f1.4, where you can see that it is indeed a bit glowy and soft wide open at f1.4 (a crazy f1.0 equivalent with the Lens Turbo), but it sharpens up nicely from f2.0 on.

As another test, I made a little test of all selectable apertures on the FD 50mm 1.4, which goes from f1.4 (duh), all the way to f22:


Canon FD 50mm f1.4 - f22 - hooray for Google+ automatic GIF creation :)

View all intermediate apertures on this webalbum:
https://plus.google.com/photos/+HasanKaragülmez/albums/5948043545042752065


So, what about the Canon FD 35mm f2?

Well, besides obviously giving a wider field-of-view than the 50mm, I read on the internet that the Canon FD 35mm f2 is quite susceptible to flare even in it's native guise. The Lens Turbo is supposed exacerbate this as well. 

Well, without further ado: I can confirm that it does indeed flare more than the FD 50mm f1.4, but it's all at a level that I can live with.

To test the flare, I shot these all in the night of a light project. In other words: plenty of candidates for creating flare :)


So yeah: there's definitely flare, but overall not too shabby at all in my opinion. There's a hint of the blue-dot which apparently plagues many a Lens Turbo, but I don't have a problem with the Lens Turbo if it works like I've posted here. YMMV, as always :)

Another nice thing about the Canon FD 35mm f2 is that it's also noticeably sharper wide-open than the FD 50mm f1.4 - a very nice surprise.

Here's a wide-open f2 shot to illustrate:

Regarding price: I paid 160 euro (about 214 US dollar) for this FD 35mm f2.
Quite a bit more expensive than the 50mm 1.4, but then again, the 50mm 1.4 is just ridiculously cheap :)

Besides, these two FD lenses + Lens Turbo are about the same price for what I paid for the Sony 35mm 1.8 OSS (a.k.a. SEL35F18, hands-on post here: http://hasankaragulmez.blogspot.com/2013/05/sony-35mm-18-oss-sel35f18-hands-on-with.html ).


Compared: Lens Turbo + FD 50mm 1.4 vs EF 50mm 1.8

Canon FD 50mm f1.4 - Canon EF 50mm f1.8


I don't have a full-frame camera, unfortunately, but as a final test, why not try and compare these lenses to the Canon 7D with a full-frame EF 50mm 1.8 lens.

Canon 7D - EF 50mm f1.8


Remember, the Lens Turbo is a 0.726x converter, which should make a 50mm lens:
 50mm * 1.5 cropfactor = 75mm * 0.726 = 54.45mm equivalent.


So, basically, we expect to be slightly zoomed in with the NEX-6 and Canon FD 50mm 1.4 compared to the Canon 7D with EF 50mm 1.8, right? Nope!

Here's the Canon 7D with EF 50mm 1.8:
Canon 7D - EF 50mm 1.8


Here's the NEX-6 with Lens Turbo + FD 50mm f1.4:
NEX-6 - Lens Turbo + FD 50mm 1.4

So, you can see here that the Lens Turbo with a full frame Canon FD 50mm 1.4 gives a *MUCH* wider view than the Canon 7D and full frame EF 50mm 1.8 lens. Pretty significant difference huh?

The Canon actually has a 1.6x crop-sensor, so its field of view is equivalent to a: 50mm * 1.6 crop = 80mm full-frame lens. Still very nice for portraits.


The Lens Turbo, on the hand, makes a full-frame 50mm lens behave almost exactly like it would on full-frame.

The nice thing now is that we can change our framing, but still keep our subject in the frame. For example, since we are now able to position our subject closer by, we can blur out the background more as the background is now further away related to the subject.

See here: same camera position, different subject position. Notice the background melting away, making our subject stand out far more:
NEX-6 - Lens Turbo + FD 50mm 1.4

Nice huh?


Another option would have been to bring the camera closer by of course, rather than the subject, but you get the general idea :)

BTW, in practice, lenses designated a certain focal length (e.g. 50mm) can actually diverge a bit, so it's not all exact anyway, but should be close to 50mm.


Compared: Lens Turbo + FD 35mm f2 vs Sony 35mm 1.8 OSS (SEL35F18)

Staying on the same NEX-6 camera, we can do a test here of two 35mm lenses - the Sony SEL35F18 and the Canon FD 35mm f2.

The difference between these lenses specs-wise in native guise is actually pretty close, with the Canon being a full-frame lens, but the Sony being a third of a stop brighter. Also, something not to be sniffed at, the Sony actually has an image stabilizer.

Sony 35mm f1.8 OSS - Canon FD 35mm f2


However, the Lens Turbo makes the Canon FD 35mm f2 give the brightness of a 1.4 lens, and more light beats having an image stabilizer in my eyes. This is especially true for when trying to capture movement as that's where shutter-speed will matter. 
After all: an image-stabilizer cannot stop the world from moving :)

Let's see what the difference is between the SEL35F18 and the Lens Turbo + Canon FD 35mm f2, both on the Sony NEX-6.

Remember here, that the FD will have an expected field-of-view of 35mm x 1.5 cropfactor x 0.726 = 38,115mm. 

But wait: the SEL35F18 should give field-of-view about equivalent to a 50mm full-frame lens, so we expect to be slightly zoomed out with the Lens Turbo + Canon FD 35mm f2.

Let's see, here's the SEL35F18:

SEL35F18 - Autofocus is nice, but it actually missed the head a bit here :)


And here's the Lens Turbo + Canon FD 35mm f2:


NEX-6 - Lens Turbo + Canon FD 35mm f2


As you can see, the Lens Turbo + Canon FD 35mm f2 gives a field of view that is wider than that of the SEL35F18, as expected.

Finally, I can say that both of these lenses are sharp enough for me.


Conclusion

Go buy it :)

No, seriously, if you're even remotely interested, you can buy a Lens Turbo and a nice FD 50mm 1.4 for quite cheap and see if it's worth it or not. If not, you've still not lost a great deal.

It's exactly this mindset I had as well, and I have to say, this really gave me a new dimension in photography. Yes, manual focusing can be hard, though focus-peaking and zooming helps. And yes, these old vintage lenses aren't as clinically sharp as modern computerized designs from 20-30 years later (though some are, few of those are reasonably priced).

But sharpness isn't everything in my opinion, and these lenses already give a me a lot of fun in return for the modest investment I made.

I'll report back if I've got something else to say on the matter, in the mean time, happy shooting and let me know if you've got any questions or remarks. 

I'm here to learn as well after all :)


Wednesday, May 15, 2013

Canon 7D, ISO 12800 and Lightroom, in practice

by Hasan Karagülmez


Canon 7D with 24-70mm f2.8 L

Introduction

The Canon 7D.

Loved and loathed probably equally by its (ex-)users, if the great photo-forums are to believed.
Most of the criticisms are in regard to the ISO-performance of the camera, which is often said to be, well, awful.

Well, it *is* a pretty old camera I guess. In fact, I think I've got mine since late 2009 and there have been some amazing camera's coming out in the meantime.

Like a lot of photographers I'm really lusting after a full-frame camera like the 6D (if only it wasn't for the rather pedestrian autofocus...) and the 5D Mark III for their amazing high-ISO performance.
Now, don't get me wrong, the 5D Mark III is really the full-frame camera that I want, but it doesn't exactly come in cheap :)

So, I'll just have to make do with my crippled- crop-sensor camera in the meantime... so why not experiment a bit, right?

ISO 12800 Test

One of the things I wanted to try out is to see how the Canon 7D would hold up at its maximum ISO, which is ISO 12800. Now... for those regularly reading reviews of camera's, this is bound to result in absolute disaster with APS-C camera's - let alone a pretty old one!

Or is it?

Now, I'm not one to peruse really scientific testing of high-ISO, so I won't - besides, I'm far too lazy to do something like that! I just wanted to know what my camera will perform like in practice in such a situation.

For me that means using Adobe Lightroom 4, shooting RAW and, in this case, shooting ISO12800 of course :)

For these test-photo's I've used the Canon 24-70mm 2.8 L lens. It's a very late model and performs stellar as far as I'm concerned. These shots were taken with a polarizer-filter on it, which I believe caused some flare (yes, at night). It's not impossible that I'd be using a polarizer at night, so for me this is still a practical situation.

All shots have been imported in Adobe Lightroom, and then edited with the available controls. That means doing cropping, setting white-balance, doing noise-reduction and such, all within Lightroom.
Don't get me wrong, I have no doubt that PhotoShop is capable of superior results, because of more fine-grained control, but for me that's just not practical as that would take a lot more time - time I don't have. Sometimes good really is just good enough.


Enough talk! Let's see what happened!

Note: all these photo's are available on the webalbum btw! All shots have a max-side of 1980px (i.e., more than enough for web-use).

Shot 1

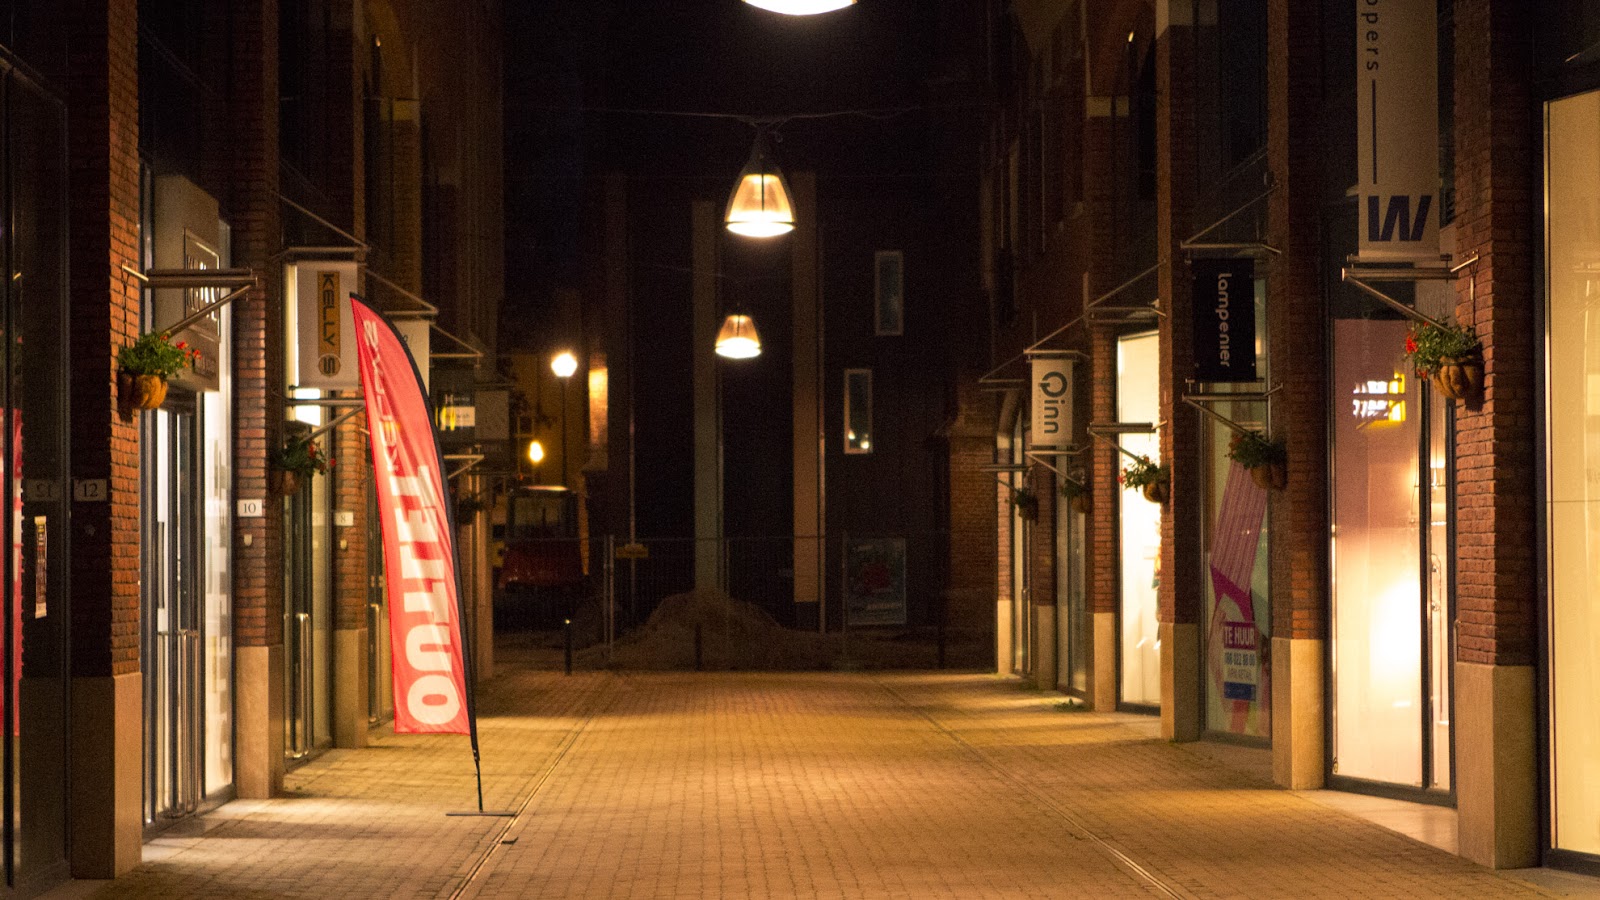
First image, a pretty dark street. The buildings appear pretty dark because of the directional street lighting, aimed at the street:
Canon 7D - ISO12800
Shutter: 1/25th, Aperture: f2.8, handheld ISO12800,  Exposure compensation: +2/3

It's possible to slightly sharpen this across the entire image, but it'll look increasingly worse at higher resolutions. You'll get away with it at these sizes, check it out, same image:
Shutter 1/25th, Aperture: f2.8, ISO12800 - increased clarity and brightness slider in Lightroom

Shot 2


OK, second image, another dark street, more like an alley:
Shutterspeed: 1/6th, Aperture: f2.8, handheld ISO12800. Exposure compensation: +1
Not too bad noise-wise, usable as well. Considering the shutterspeed on this non-stabilized lens, sharpness is actually OK in my book.


Shot 3


Next photo, mostly lit by shoplights, and low-intensity street lighting:
Shutterspeed: 1/30th, Aperture f2.8, handheld ISO12800

Again, not too bad. For ISO12800, this looks pretty OK considering the situation, even at a resolution of 1980x1320


Shot 4, underexposing, then pulling back up in postprocessing


For the next photo, I wanted to test what the result would be if I would underexpose 1 stop (-1EV) and then pull that back up in post-processing.
Let's see what happened:
Shutterspeed: 1/60th, Aperture f2.8, handheld ISO12800

Ouch. Seems like that doesn't work too well...

Let's see what happened when we use the expose-to-the-right principle:
Shutterspeed: 1/8th, Aperture: f2.8, handheld ISO12800. Exposure compensation: +2/3

There's a bit of motion-blur caused by the shutterspeed, but the resulting image is a lot cleaner. Check the H&M sign on the left and the tree-top in the middle - there's a very big difference.
So, same ISO, different exposure -> completely different noise-result.


Shot 5


Another shot in the same street, also using expose-to-the-right principle:

Shutterspeed: 1/30th, Aperture: f2.8, handheld ISO12800. Exposure compensation: +2/3
Focus on the puddle. Pretty good result all-in-all.


Shot 6


OK, walking a bit farther. This is a pretty dark spot as well, street mostly lit by the shops:
Shutterspeed: 1/30th, Aperture: f2.8, 70mm, handheld ISO12800, Exposure compensation: +2/3 

Standing still, but zooming out to 24mm introduces some very dark walls into the shot, and it´s on these walls where you can see that noise is more pronounced.
Perhaps I should have exposed a bit more to get rid of more noise as much as possible:
Shutterspeed: 1/30th, Aperture: f2.8, 24mm, handheld ISO12800, Exposure compensation: +2/3 

Shot 7


So, what happens when we overexpose quite a bit, but then pull back the exposure in Lightroom, 3 stops back in this case:
Shutterspeed: 1/15th, Aperture: f2.8, 70mm, handheld ISO12800, Exposure compensation: +1 1/3 

Nice, that's one of the cleanest results thus far! It seems working like this gives pretty good results!


Shot 8


Let´s try reasonably close detail shot of a flower:
Shutterspeed: 1/15th, Aperture: f2.8, 70mm, handheld ISO12800, Exposure compensation: +1 1/3 


If you click on the image or head over to the webalbum for this shot, you can view it larger. There you'll see that detail is actually pretty well retained, but there's quite a bit of noise in the out-of-focus areas.

That's too bad, but also good in a way: because out-of-focus areas are.. well... out-of-focus anyway, you can apply more noise reduction in those areas.


Shot 9

Let's try and re-use that +1 1/3 exposure compensation for the following shot, hopefully resulting in a better result:

Shutterspeed: 1/20th, Aperture: f2.8, 27mm, handheld ISO12800, Exposure compensation: +1 1/3
Again, a pretty good result.

Shot 10

The disadvantage of adding a lot of exposure compensation consistently at these high-ISO's, is that spots which are already quite well lit get overexposed more easily.
Shooting RAW will help you, but there's a limit to what it can do, such as in this shot where I used the highlight-slider to slightly recover the overexposed areas.

Shutterspeed: 1/20th, Aperture: f2.8, 27mm, handheld ISO12800, Exposure compensation: +1 1/3

Dynamic range is simply less at high-ISO's, limiting your ability to recover highlights and push shadows  so it's just essential to nail the exposure when taking the photo!


OK, enough photo's, let's keep it at that shall we!

There are a couple of more images in the webalbum. Some photo's have more variants, whereby the second one is usually the one which is slightly sharpened.
They tend to look worse on high-resolution but usually pretty ok at smaller resolutions.


Conclusion


In my opinion, the Canon 7D ain't half bad when using these extreme ISO's. Sure, don't expect superb per-pixel sharpness at ISO 12800, but come on... it's ISO12800! On a cropsensor-camera!!

So, some things I've learned, which would work for me in practice:
  • It will *definitely* help to "overexpose", or rather Expose-to-the-Right on the histogram. Underexposing and then pushing another stop at ISO12800 (making it a ISO 25600 equivalent) is not a good idea.
  • Make sure to get as much light on the sensor as possible, and definitely expose-to-the-right and then ideally reduce the exposure a bit in post-processing to get as little noise as possible.
  • Noise will manifest itself distractingly mostly in out-of-focus areas. Too bad for your bokeh, but then again, you *CAN* apply more noise-reduction in getting the out-of-focus areas more clean noise-wise and get away with it.

    Note that color-noise is far more objectionable than luminance-noise! Lightroom doesn't even seem to use luminance noise-reduction at standard.

    Lightroom does have a pretty high Sharpness setting by default though (25), which can, and will, also sharpen noise.
    Lightroom Sharpness and Noise Reduction
    Lightroom Sharpness and Noise Reduction, try using less Sharpening
      Tip: try and use less of sharpening and check the results.
       
    • As a personal favorite, shoot RAW. It makes post-processing a lot easier, changing white-balance without drama for example, as well as noise-reduction settings.
      If shooting JPEG works for you, then that's all fine-and-dandy of course - it'll save a lot of disk-space for sure :)
    • Set your expectations: don't expect amazing quality at this ISO suitable for A3 prints, but if it makes the difference about missing a shot or a having noisy one, I know what I'd choose.

    The best thing for me is that the Canon 7D does NOT exhibit banding noise, even at these extreme ISO's! For those of you having been "lucky" enough to experience that, you'd have noticed that banding noise is a very distracting type of noise, far more than colour- or luminence-noise.

    By the way, from what I understand from reading photo-forums is that apparently there's some copy variation with regard to sensor performance of the Canon 7D. I find this surprising, because I bought the 7D pretty early on, and I'd have expected it to get better along the way, if anything. In other words: your mileage may vary, though I'd love to hear what your experience has been!

    Also: you'd be surprised with what you'll get away with when resizing, don't just delete photo's if your intent is to just post them online. Also, don't go zooming into 100%, no sane person does\should do that...

    By the way, if you want to see how the 7D held up in the very dark Mercedes-Benz Museum, check my other recent blogpost: Visit the Mercedes-Benz Museum in Stuttgart!

    There are more than 150 photographs and where you can see how it handled the low-light. All those shots have been edited in Lightroom as well.


    That's it, don't forget to have fun and happy shooting!


    Related links

    Here are some related links which led me to do my own small test. Some people get some amazing results.
    1. "Visit Mercedes-Benz Museum in Stuttgart!", Hasan Karagülmez,  Used the 7D in this pretty dark museum. If you want to see how it held up, check the following blogpost,
      http://hasankaragulmez.blogspot.com/2013/05/visit-mercedes-benz-museum-in-stuttgart.html
    2. "Post your ISO 12,800+ photos!"-topic on photography-on-the.net,
      http://photography-on-the.net/forum/showthread.php?t=919780&highlight=12800+show
    3. "Mini-Review: 7D vs 5DII High ISO 3200-25600"-topic by Teamspeed,
      photography-on-the.net, http://photography-on-the.net/forum/showthread.php?t=930196
    4. "7D vertical banding - a "regular fault"?"-topic, photography-on-the-net,
      http://photography-on-the.net/forum/showthread.php?t=759283
    5. "Mini-Review: Trying To Get the Most out of the 7D High ISO Images "-topic by Teamspeed, photography-on-the-net, http://photography-on-the.net/forum/showthread.php?t=1079217
    6. "ISO 12800 Canon 7d "-topic on photography-on-the.net, http://photography-on-the.net/forum/showthread.php?t=1248911&highlight=post+12%2C800

    Sunday, May 12, 2013

    Visit the Mercedes Benz Museum in Stüttgart!

    by Hasan Karagülmez
    Hey all, just want to share my impression of the Mercedes-Benz Museum in Stüttgart, Germany. I visited it as part of my roundtrip of visiting the BMW, Porsche and Mercedes-Benz museums. I visited them all in December 27th, 2012, which explains the Christmas-theme in some of the photo's :)

    Anyway, this blogpost is about my impression of the Mercedes-Benz museum. I've uploaded 155 images, all of which you can view on the webalbum!

    On to the museum itself: for those who've never been there, I can really highly recommend it! Mercedes-Benz have put a lot of effort into their museum and it really really shows.

    For starters, you can really feel ans see that there's a lot of love for their history. For example, a lot of youngtimers are just standing there proud in the main-entrance hall, right next to new models. Rightfully so, they're beautiful!
     
    Entrance hall of the Mercedes-Benz museum, in December 2012
    Entrance hall, December 2012


    Right, on to the museum itself! It´s just humongous, but starts off humbly :) After you've bought your ticket, you can take an elevator which goes to the top floor. As you approach the top, you hear faint noises of horses... weird! Does one of the other persons have a weird ringtone?

    Nope, when the elevator doors open, it all falls in place, because the noises were just a precursor to what you're about to see next which is...

    ... a horse!

    I don't think this was the horse making noises though ;)

    You quickly get to see the first ever car in the world after that though, which are laid out on a rotating plateau. In the surroundings there are a variety of vehicles and boats which have all been motorized in the course of history - showing you how the revolution of the internal combustion engine takes over the world.


    After that, you can dwindle down each department of the museum, going downwards. At the walls between intersections images are collected of what happened in the world, throughout the years - think of the invention of x-rays, Einstein's Relativity Theory, invention of aeroplanes, WWII, the landing on the moon, etc.


    At each department, models of a specific era are laid out. Being there in person you can really see how big those oldtimers from e.g. the 1920's are! I was surprised at least. You really did not want to get hit by one of those mammoth cars, and I wouldn't want to park one of those in a tight spot either :)


    Slowly but surely, the farther you come down, the more you'll see of cars (and history) of the modern times. You'll even get a glimpse of the future, with concept cars and such.

    As one of the last stands, you're in for a grand finale with an overview of all Silberpfeile laid out for your viewing pleasure.


    If you visit, I would advise you to take your time for this museum, you can easily fill an entire day if you want to.
    In fact, I did actually fill an entire day with it, and I don't think I've even seen it all!

    You certainly get value for money though! :)

    Some extra info for visitors:
    • For parents: You're welcomed to take your children along! There's even a bus where children are allowed to come in, as well as some trucks. You can take breaks at each intersection where you can sit, and have an overview of what's to come there as well.


    • For photographers: The museum is really beautiful but also quite dark! Be sure to keep that in mind. Full-frame photographers might be better off, but I struggled a bit with the 7D and Canon 24-70L 2.8, Sigma 30mm 1.4.

    I don't think I've used the kitlens, with Image Stabilizer, but I guess a stabilizer will help.

    Also, it's quite a busy museum, so almost inevitably you'll get people in the shots. Next time, I'm thinking of taking a monopod along, and use longer shutter times (hopefully slightly blurring people away in the shot). I'd also definitely take a polarizer along to get rid of reflections in the cars.

    That's it, if you want to view all the 155 images I took as part of this impression, visit the webalbum!